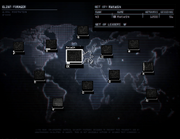
GL.BAL FORAGER is a collaborative effort to establish a ground network of computers to control relay satellites in orbit. A continuous global network is needed to ensure complete orbital coverage. To this end, the world has been divided into 12 regions, each with its own Network Ground Station and discrete network penetration meter. After region penetration is complete, distinct sequences of images have been observed in the regional markers.


The GL.BAL.FORAGER* main screen
Current region penetration[]

Overview of Territories
| # | region | penetration (%) |
|---|---|---|
| 0 | Global | 100 |
| 1 | NAW | 100 |
| 2 | NAE | 100 |
| 3 | CASUS | 100 |
| 4 | AMAZON | 100 |
| 5 | NEURO | 100 |
| 6 | WEUR | 100 |
| 7 | HYRCAN | 100 |
| 8 | KUSH | 100 |
| 9 | RUS | 100 |
| 10 | PASIA | 100 |
| 11 | MESAI | 100 |
| 12 | AUSIA | 100 |
When your home network region reaches 100% the following message is displayed and the region screen is replaced by sequence of pictures.
---
DARKNET ANNOUNCEMENT
Your region has assimilated all Network Grids required.
DARKNET grids have been replaced by SECURE ENLINT nodes.
DARKNET strength increased by 10. RELAY SAT and GROUND STATION are online and standing by.
Help is urgently required in other regions, or you can continue to create redundancy in your region.
When all twelve DARKNET regions are converted and online, we will have complete global presence and the satellite will be in our control.
We will finally be in a position -
to show the entire world
The Truth.
---
- DARKNET ANNOUNCEMENT : ALL REGIONS -
Global DARKNET conversion is COMPLETE.
All REGIONS are ELINT-SECURE.
RELAY STATS & GROUND STATIONS are STANDING BY.
---
Region Abbreviations[]
- NAW - North American West
- NAE - North American East
- CASUS - Central America and Southern United States
- AMAZON - Amazon
- NEURO - Northern Europe
- WEUR - Western Europe
- HYRCAN - Hyrcanian (Caspian aka Hyrcanian Sea) (?)
- KUSH - Kush
- RUS - Russia
- PASIA - Pacific and Asia
- MESAI - Middle East, South Asia and India
- AUSIA - Australia / Oceania
Difficulty levels[]
Soft Target[]
This is the initial level when you first start GL.BAL.FORAGER*. Winning adds 50 (before the update 10) network nodes to Darknet.
Hard Target[]
This is the first difficulty level unlocked, it becomes available once you have captured 50 network nodes. Winning this mode adds 200 (before the update 50) network nodes to Darknet.
Black Echo[]
This is the hardest difficulty in GL.BAL.FORAGER*. It becomes available when you capture 500 network nodes and winning it awards you 500 more network nodes.
Badges[]
Soft Target[]
This title and badge are rewarded after getting over 100 network nodes captured.
Hard Target[]
This title and badge are rewarded after getting over 1000 network nodes captured.
Black Echo[]
This title and badge are rewarded after getting over 10000 network nodes captured.
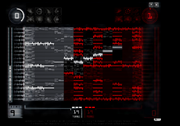
Black Echo Tutorial[]
The most effective way to win at Black Echo is to follow a Blitzkrieg strategy. If you start to get stuck or boxed in, restart, since the odds of winning decrease dramatically.
Below are screenshots showing how to win at one starting setup and describing the rational behind the moves being made.
Initial Setup[]
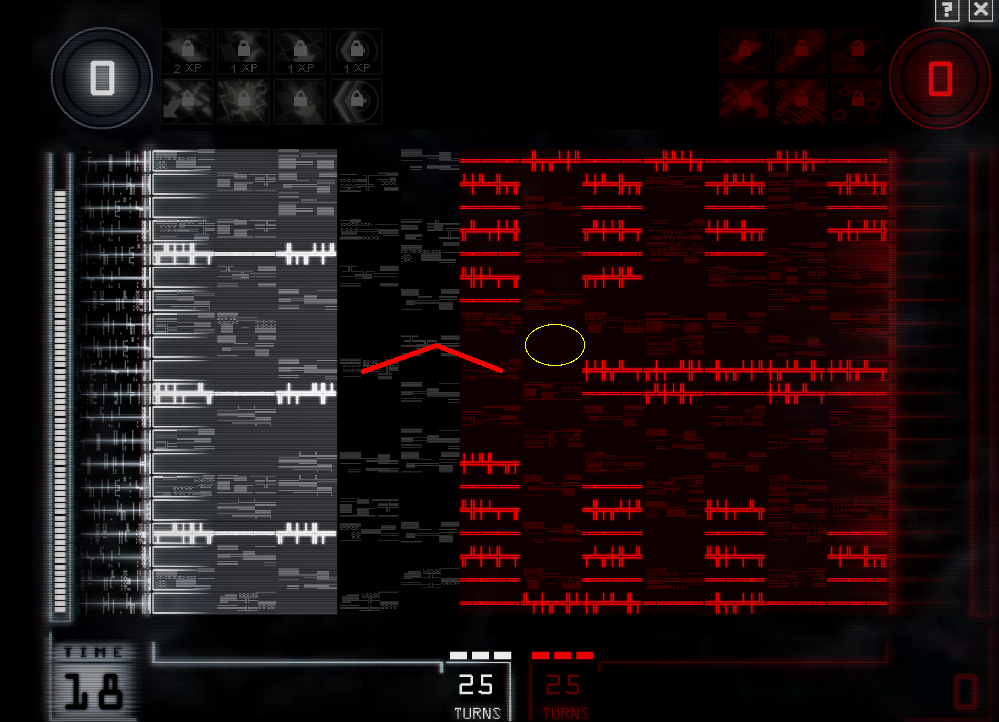

Initial setup
The red lines in the picture above show which moves you should make until the grid changes. The idea is to position yourself to move into the circled place once the grid changes. This is possible because the space is not available for the computer to move into until after the grid changes, which leaves it open for you. Let's assume the grid changes to the screenshot below. This screenshot came from a slightly different starting position, but the same initial strategy applied.
First Grid Change[]


First grid change
The idea as stated above is to move into the position of the circle. Due to where the computer moves, your only option to move forward is to move diagonally up and right. Now after this move, we have 1 XP, which seems to have the greatest effect if you use the double move to get 1 space closer to the end, as shown by the thick red line. This is your 3rd move, cuing yet another grid change. (I have noticed a subtle shift- one no longer has 1 XP by the end of this, completely derailing the strategy.)
Second Grid Change[]

Second grid change
At this point, the 2nd grid change provides us with no moves forward, so the best strategy is to simply fortify your existing path for 3 moves until the next grid change.
Third and Fourth Grid changes[]


Third and fourth grid change
In this case, the 3rd Grid Change provides us with a move forward, however we are blocked in at the last column. The idea here is to wait until 2 XP have accumulated after 1 more grid change. At this point, use the power up to destroy one of the computer's pieces in the last column, top left power up, and move there. In this case, only the bottom piece is a valid one to explode, since the top and middle are on empty spaces in the current grid, shown by lack of things extending outward from them.
If at the 1st grid change we had gotten boxed in, or the grid place circled in the starting setup was not available, it is probably best to restart and try again, since by the second grid change the computer has power ups which will make extending out quickly near-impossible.
Video Example[]


Starting Maps[]
There a limited number of starting points. Knowing this will help you out somewhat.
Soft Target[]
")
")
Hard Target[]
")
")
")
Black Echo[]
")
")
")